
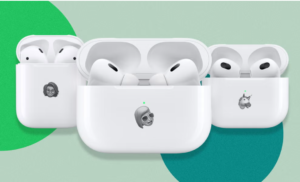
Apple’s AirPods Pro are a huge redesign over the customary AirPods.
The base model permits you to pay attention to your number. One music and digital recordings, converse with Siri, trigger highlights with a tap. Check the battery charge, and track down them in the event that they’re absent. However, with the Pro, you can get a superior fit, completely upgrade the audio quality, enhance battery charging, and exploit other cool highlights.
A portion of the highlights depicted here work just with the second era AirPods Pro. Others require iOS 17 and iPadOS 17 or higher. Before you get everything rolling, ensure you’ve refreshed your iPhone or iPad to the most recent rendition. Go to Settings > General > Programming Updates and tap the Introduce or Refresh button to apply the most recent update. Presently, the following are a couple of tips to assist you with benefiting from your AirPods Pro.
1. Update the Firmware
Your AirPods Pro ought to likewise be running the most recent firmware if you have any desire to exploit the most recent elements. The firmware adaptation changes in light of the model and age of your AirPods Pro. To check which adaptation you ought to have, peruse to Apple’s firmware support page and track down the most recent firmware variant for your particular model.
To check the firmware you have right now introduced, segue to your iPhone, go to Settings > Bluetooth, and afterward tap the Data icon for your AirPods Pro. Shift focus over to the Form posting under the About area, which will show the ongoing firmware.
Try not to have the most recent firmware? You should simply ensure your AirPods Pro are charging and in Bluetooth scope of your iPhone or iPad. Stand by a brief time and afterward really take a look at your iPhone to check whether the most recent firmware has been introduced.
2. Take the Ear Tip Fit Test
One of the downsides with the normal AirPods is that they utilize a one-size-fits-all approach with an in-ear plan that doesn’t be guaranteed to fit all ears properly. On the off chance that the fit isn’t cozy, the AirPods can undoubtedly and immediately get out of your ears. The AirPods Pro amends that imperfection by changing to an in-waterway plan with replaceable tips for little, medium, and enormous ear trench estimates (the second gen AirPods Pro additionally offer an additional little choice).
Naturally, the AirPods Pro are bundled with the medium tips, yet you can undoubtedly change sizes. To change out the ongoing tips, pull immovably on them until they segregate from the base. Position the new tips so the middle white circle meets with the middle dark circle on the base. Then, at that point, push until they fit properly.
To assist you with figuring out which of the three size tips will provide the best seal and sound, take an Ear Tip Fit test. To do this, append one sets of the tips to the foundation of both AirPods Pro. Then, at that point, embed both AirPods in your ears. On your iPhone, go to Settings > Bluetooth and tap the data icon for your AirPods Pro. Pick Ear Tip Fit Test, then tap Proceed and Play.
A short music cut plays. Subsequently, the application will let you know if your ongoing tips offer a good fit. If not, it will advise you to either change your tips or attempt an alternate size. Go through the various sizes until the application lets you know that both AirPods say Good Seal.
3. Change the Name of Your AirPods Pro
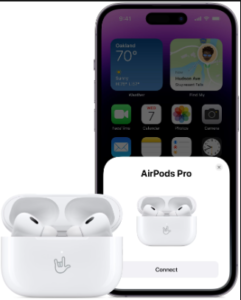
The name of your AirPods Pro shows up in at least one or two spots, yet you’re not stayed with it. Ensure the AirPods Pro are in your ears. On your iPhone, go to Settings > Bluetooth. Tap the data icon for your AirPods Pro and afterward tap the ongoing name.
4. Control Music with a Press
You’re ready to control the progression of music by squeezing the stem of either your left or right AirPods Pro. To do this, press the stem with your thumb and index finger until you hear a low snap. Press once to stop/play, twofold press to skirt forward to the next track, and triple-press to jump in reverse to the beginning of your ongoing track or to the past track.
5. Press to Mute and Unmute
Do you ever use your AirPods Pro during a phone call? If so, you can take advantage of a new mute and unmute feature. To set this up, go to Settings > Bluetooth and tap the Info icon for your AirPods Pro.
Under Call Controls, tap Mute & Unmute and choose whether to activate the option by pressing once or twice on the stem of one of your AirPods Pro. The next time you’re speaking to someone via your AirPods Pro, press the stem once or twice. Press it again the same way to unmute yourself.
6. Adjust the Volume on the 2nd Gen AirPods Pro
The second era AirPods Pro upgrade the headphones with better audio quality and different elements. One choice allows you to change the volume by swiping all over on a sensor situated on the stem of the AirPods. To empower this, go to Settings > Bluetooth, tap the data icon next to for your AirPods Pro and tap Availability.
Turn on the switch next to Volume Swipe. You can likewise change the time between swipes to keep away from incidental volume changes by choosing Longer or Longest. Presently when music is playing, you can put your thumb on the stem of either AirPod, and utilize your pointer to swipe up or down on the control. As you do, the volume will increment or diminishing.
7. Turn on Noise Cancellation
The AirPods Pro deal different listening modes that can assist with cinching down on foundation noise, including Noise Wiping out, Straightforwardness, and Versatile. To change the mode. You can open Control Place and press down on the audio control, then, at that point, pick Noise Control. You can likewise go to Settings > Bluetooth, pick the data icon next to your AirPods, and afterward tap one of the accompanying.
Noise Retraction: This turns on the noise undoing highlight that blocks out essentially all foundation sounds, so this can prove to be useful in a loud climate where you need to hear your audio plainly.
Straightforwardness: Pick Straightforwardness mode to suppress the foundation noise so you can in any case hear it without it slowing down your audio. This would be a good choice for public spots where you actually need to hear declarations or in any case stay mindful of your environmental factors.
Versatile: For those running iOS 17 or iPadOS 17 with the second Gen AirPods Pro, you can pick Versatile Audio, which is a combination of Straightforwardness and Dynamic Noise Undoing. It adjusts the volume of the ongoing audio in light of your current circumstance and connections.
Off: This switches off all noise wiping out highlights, which will permit you to hear your environmental elements, however it might likewise obstruct your audio.
You can switch between modes with a long push on the stem of one or the other bud. You ought to hear a ring to imply that another mode has been initiated.
8. Turn on Spatial Audio
A component novel to AirPods Pro and the third Gen AirPods is spatial audio, which brings head following and encompass audio effects to upheld recordings. Go to Settings > Bluetooth, then, at that point, tap the data icon next to your AirPods and tap Customized Spatial Audio.
Pick Customize Spatial Audio, then tap Proceed. Eliminate your AirPods, assuming you have them in your ears, and permit your telephone to filter your face. Presently fire up an upheld audio or video to hear Spatial Audio in real life.
Apple TV+, Disney+, iTunes, and HBO Max all help spatial audio, for instance, so play a film or Television program from one of those administrations. On the off chance that you picked a viable video, you ought to now hear the audio shift in encompass sound as you move your head, body, or iPhone.
9. Turn on Conversation Awareness
With iOS/iPadOS 17 or higher and the second Gen AirPods Pro, you can attempt another element known as Conversational Mindfulness. Distinguishing when somebody next to you or on a call begins talking, this choice tones down the volume of any audio presently playing. A comparable choice called Customized Volume will change the volume of your audio in light of your current circumstance.
To empower this on your iPhone, go to Settings > Bluetooth, tap the data icon next to your AirPods, and afterward turn on Discussion Mindfulness. Here, you can likewise empower Customize Volume. On the other hand, open Control Place, push down on the audio control, and afterward tap Discussion Attention to turn it on or off.
10. Customize the Presses
Naturally, squeezing and holding the stem of either AirPods Pro moves among Noise Crossing out and Straightforwardness (and Versatile for some). Yet you can change that for either of them. With the AirPods Pro in your ears, go to Settings > Bluetooth, then, at that point, tap the data icon next to your AirPods.
Under the Press and Hold AirPods area, you can set what each stem controls by tapping Left or Right. Here, you can keep Noise Control as the actuated activity when you long press yet additionally add the various modes you can push through. On the other hand, you can switch the activity to Siri and call around the associate when you long press a stem.
Rather than setting both headphones to control a similar component. It very well may be ideal to set one headphone to change Noise Control. While the other can be utilized to control Siri.
11. Tweak Accessibility Settings
To control specific availability elements of your AirPods Pro, go to Settings > Bluetooth, tap the data icon next to your AirPods, and afterward open Availability. Here, you can change the speed expected to press the stems of your AirPods to stop, play, avoid ahead, or go back.
You’re additionally ready to change the term required for squeezing the stems to change the noise wiping out mode. Further, you can empower noise dropping with one AirPod and control the volume swipe.
12. Improve Sound Quality
A component known as Earphone Facilities upgrades the audio from your AirPods by supporting gentler sounds and certain frequencies. To set up this element, go to Settings > Bluetooth and tap the data icon next to your AirPods. Open Availability > Audio Openness Settings > Earphone Facilities and empower the element.
Tap Play Test to hear some test audio. You can then tune the audio for a reasonable tone across a scope of frequencies, vocal reach for center frequencies, or splendor for higher frequencies. You can likewise help gentler sounds somewhat, reasonably, or unequivocally.
Which settings turn out best for your own preferences. On the other hand, the audio result can be tweaked in the event that you tap Custom Audio Arrangement and answer a couple of inquiries. Your audio settings will change in light of your responses.
13. Share With Other AirPods Users
In the event that another person has a bunch of AirPods or Beats earphones. You can impart your audio to them. While standing by listening to something with your AirPods Pro, access. The Control Community on your iPhone and tap. The AirPlay icon for the ongoing audio.
Tap Offer Audio and pick the other arrangement of AirPods or Beats earphones. You ought to then see sections for the two earphones. Tap the circle for the other set to interface it. You can now control the volume for both or for every one independently.
14. Turn Your AirPods Into a Hearing Aid
You can involve your AirPods Pro as a portable hearing assistant through an element called Live Tune in. To begin with, you’ll have to add the component to Control Center on your iPhone. Go to Settings > Control Center and tap the + icon next to Hearing to add it to Control Center.
Put the AirPods Pro in your ears. Open Control Community and tap the ear icon, then, at that point, pick Live Pay attention to turn the component on. Presently place your telephone next to the individual or audio source that you need to hear all the more obviously, and the sound will be enhanced. Switch off Live Tune in by tapping the section in Control Community.
15. Check the Battery Charge
You can utilize your iPhone to check the ongoing charge on your AirPods Pro and the charging case. Keep both AirPods Pro for the situation and open the cover. A card shows up on your iPhone‘s screen to demonstrate the charge levels of both the case and the AirPods.
Remove one AirPod from the case, and the card changes to show the charging level for each AirPod independently. Remove them both from the case, and the card shows the charging level for the AirPods, yet not the situation.
At long last, you can assist with broadening the general battery duration of your AirPods Pro by telling your tiny headphones to hold on to get done with charging past 80% until you really want to utilize them. To set this up, go to Settings > Bluetooth, pick the data icon next to your AirPods, and afterward empower Enhanced Battery Charging.
On the off chance that you conclude you don’t need this setting, switch the switch off once more. You’ll be found out if you have any desire to switch. It off until tomorrow or turn if off for all time.